
How to Use a Golf Divot Repair Tool Properly on the Course
Every golfer has seen it. A perfectly smooth putting green marked by small craters left by approach shots. These depressions, called pitch marks or ball marks, form when a golf ball lands on the green with force. Left unrepaired, they take weeks to heal on their own. However, a properly repaired mark recovers in as little as 24 hours.
Knowing how to use a divot repair tool correctly is one of the most important skills a golfer can develop. It keeps the course in great condition, improves the putting surface for everyone, and reflects respect for the game. Yet many golfers either skip this step entirely or do it incorrectly, making the damage worse.
This guide explains exactly what to do, step by step, so you can handle golf green repair with confidence every time you play.
What a Divot Repair Tool Actually Does
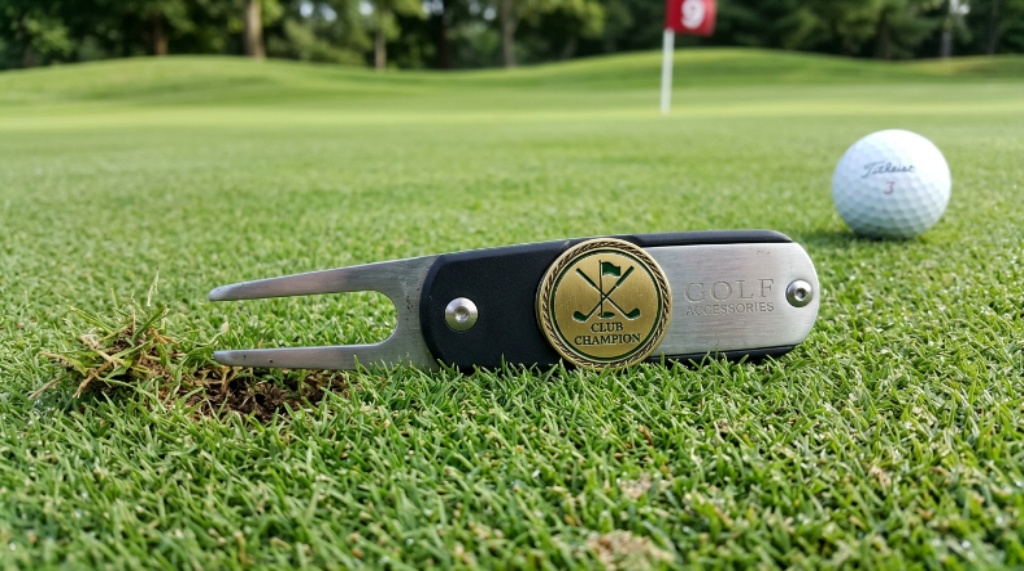
A divot repair tool, sometimes called a pitch mark repairer or turf repair tool, is a small handheld device with two prongs. It is designed to lift and level compressed grass around a ball mark on the green. The goal is to gently work the surrounding turf back toward the center of the depression without tearing the roots beneath.
When a golf ball strikes the green, it does not just create a dent. The impact compresses the soil and grass roots beneath the surface. If you simply push the soil back up from underneath, you risk further damaging those roots. The correct technique avoids this problem entirely by working from the outside edges inward.
Most divot repair tools are small enough to carry in your pocket or clip onto a golf bag. Additionally, many ball markers come with a built-in repair fork, making it one of the most versatile golf maintenance accessories a player can own.
Why Proper Repair Technique Matters
Not all repair jobs are equal. Many golfers stab the tool into the center of the mark and lever the turf upward. This feels intuitive but is actually the wrong approach. Pushing from below severs the grass roots, which causes the mark to brown and die rather than recover quickly.
The right technique protects the root system and allows the grass to knit back together from the sides. A well-repaired pitch mark on a healthy green will be nearly invisible within a day. An improperly repaired mark, or one left entirely untouched, can take three to four weeks to heal fully.
Therefore, taking 20 to 30 seconds to repair your mark correctly makes a significant difference to the condition of the green over time. Greenkeepers and course managers appreciate it enormously, and so will the players who follow you.
How to Identify Your Ball Mark on the Green
Before you can repair a mark, you need to find it. This sounds obvious, but it is a step many golfers rush.
When your ball lands on the green, take note of where it pitches, not just where it comes to rest. The mark is usually a few inches behind where the ball stops, in the direction it came from. It will appear as a small indentation, sometimes with slightly raised edges and torn grass.
On soft greens after rain, marks are easy to spot. On firmer greens or in dry conditions, they can be subtler. Get in the habit of walking to your mark and checking the area carefully before you putt. Additionally, you are encouraged by the Rules of Golf to repair other ball marks you notice on your line, even if you did not make them. This is both courteous and entirely within the rules.
The Correct Step-by-Step Technique
This is the part most golfers get wrong. Follow these steps and you will repair pitch marks properly every single time.
Step one: Insert the prongs of your turf repair tool into the turf at the outer edge of the mark, not the center. Angle the tool slightly inward toward the middle of the depression.
Step two: Gently push the handle forward and slightly downward, using a twisting or sweeping motion. This nudges the grass and roots toward the center of the mark without lifting from below. You are essentially guiding the turf horizontally, not vertically.
Step three: Repeat this motion at multiple points around the perimeter of the mark. Work your way around the entire edge, always pushing inward. Four to six insertions around the mark is usually enough.
Step four: Once the edges have been worked inward and the depression has been filled from the sides, use the flat face of your putter to gently tap the repaired area smooth. This levels the surface and ensures good contact with the ground.
Step five: Stand back and check your work. The surface should look level and the grass should be lying flat. If small tufts remain upright, a few more gentle putter taps will settle them down.
The whole process takes less than half a minute. However, done correctly, its impact on the course lasts for days.
Choosing the Right Divot Repair Tool
Not all repair tools perform equally. The market offers a wide range of options, from basic two-prong forks to ergonomic designs with spring-loaded mechanisms. Knowing what to look for helps you pick one that is comfortable to use and effective on different grass types.
Two-Prong vs. Single-Blade Tools
Traditional two-prong tools are the most common and work well on most greens. The prongs should be firm but not overly sharp. Very sharp prongs can cut grass rather than guide it. Single-blade tools, sometimes called switchblade-style, have a single curved tine that some golfers find easier to use with one hand.
Ergonomic Handles and Grip
If you play frequently, comfort matters. Tools with rubber or textured grips reduce hand fatigue and are easier to use with wet hands. A tool that fits comfortably in your palm encourages you to actually use it rather than leaving it in the bag.
Combination Tools
Many of the best golf maintenance accessories combine a divot repair fork with a magnetic ball marker. These two-in-one tools are practical and convenient. The ball marker sits on top and detaches magnetically for easy one-hand access. This is a small but smart design feature that makes the tool more useful every round.
Materials and Durability
Steel prongs last longer than plastic ones and maintain their shape better over time. A well-made steel tool should last years of regular use without bending or breaking. Look for tools with a solid construction and smooth prong tips, as rough edges can snag on grass rather than glide through it.
Etiquette and Course Responsibility
Golf is a game built on mutual respect, and the condition of the course is everyone’s responsibility. Repairing your ball mark on every green is one of the clearest expressions of that responsibility. It is also part of the expected etiquette on any golf course, whether you are playing a municipal track or a private club.
Many courses display signs near greens asking players to repair one mark on the green. However, the unwritten standard among respectful golfers is to repair your own mark plus at least one more you notice nearby. This small extra effort, multiplied across a full round and a full day of play, keeps the greens in far better condition.
Additionally, never repair spike marks or scuff marks with a divot tool before putting. This is against the Rules of Golf during a round. Only pitch marks caused by ball impacts may be repaired. After completing the hole, any marks can be smoothed out.
How to Care for Your Divot Repair Tool
A good repair tool needs minimal maintenance. However, keeping it clean and in good condition ensures it performs well every round.
Rinse the prongs with water after rounds played on muddy or soft courses. Mud packed between the prongs reduces effectiveness and makes insertion harder. Dry the tool before storing it to prevent rust on steel models. Inspect the prongs occasionally for bending, as a bent prong changes the angle of entry and reduces your ability to guide turf correctly.
Store your tool in an accessible pocket on your bag or clip it to your bag strap so it is always within reach on the green. A tool you cannot find quickly is a tool you will not use consistently.
Conclusion
Proper golf green repair is a skill every golfer should master. The technique is simple but must be done correctly to make a real difference. Insert your turf repair tool at the outer edge of the mark, work the prongs inward from multiple angles, and finish by tapping the surface smooth with your putter.
Choosing the right tool matters too. Look for a durable, comfortable design that combines reliable function with ease of use. The best golf maintenance accessories are the ones you actually carry and use on every round.
Most importantly, make it a habit. Repair your mark every time without exception. Encourage playing partners to do the same. The greens you play on are a shared resource, and how well they are maintained reflects the care each player brings to the course.
Frequently Asked Questions
What is the correct way to use a divot repair tool?
Insert the prongs at the outer edge of the ball mark and push the grass inward toward the center using a gentle sweeping motion. Work around the entire perimeter before using your putter to tap the surface flat. Never push upward from below the center, as this damages the roots.
How long does it take for a repaired ball mark to heal?
A correctly repaired pitch mark on a healthy green can recover in as little as 24 hours. An unrepaired mark or one that has been damaged further by incorrect technique can take three to four weeks to fully recover.
Can I repair ball marks that other players made?
Yes, and you are encouraged to do so. The Rules of Golf allow you to repair any ball mark on the green, regardless of who made it. Repairing extra marks while you are already on the green is a sign of good etiquette and benefits everyone who plays after you.
What is the difference between a pitch mark and a divot?
A pitch mark is the depression left on the green when a golf ball lands from a high approach shot. A divot is a chunk of turf displaced by a club striking the ground during a shot, usually on the fairway. Both require repair, but different tools and techniques apply to each.
Is a combination ball marker and divot tool worth buying?
Yes, for most golfers it is an excellent choice. Combining two essential items into one compact tool reduces what you need to carry and ensures the repair fork is always within reach when you mark your ball on the green. Many models are well-made and last for years.











Post Comment